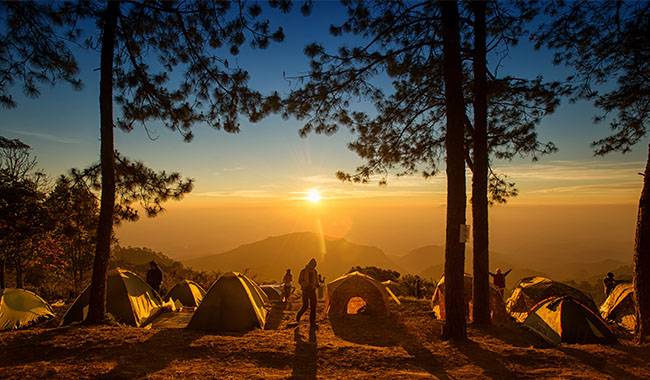
Do you love nature and want to experience a leisurely hike in the forest or mountains, perhaps discovering the beauty of a pristine forest or seeing breathtaking views from a mountain cliff? The key to a safe trip is adequate preparation. The better the route is planned, the greater the likelihood of success. A mistake on an easy section or an unfortunate accident will force you to cut your route short and wait for help. Avoid this by having a clear understanding of the route ahead. You will learn more about How to Plan a Camping Trip by LCNOutdoors article.
The earlier you start planning, the better prepared you will be. A year in advance is best. You won’t believe how fast time passes and how much there is to do. The best time to go to the mountains is the second half of July and the first half of August. The weather is most consistent, and the holiday season is at its peak. Therefore, this summer is the right time to decide your desires and schedule for next summer and make private plans for your hike. Identify key steps and target dates.
In this article, you will learn how to use topographic maps, plan a camping trip, plan your route correctly, and consider when preparing for a hike.
Check Your Health
For a whole year, we expect our upcoming vacation. When we think about travel, our mentally transported to the world of peaks and alpine meadows. It’s like you are in the first stage of being love. All the common sense will be shutting down. Same situation when we can only think about the trip and the equipment. Many people forget to think, am I ready for a trip to the mountains?
It is also very important to check your health first, but a lot of people will forget to do it. This seems to be a basic thing that many people neglect. It is no secret that being at a high altitude exacerbates all the plagues, and the consequences can be very tragic. The easiest thing to do is to check at a sporting goods store. Everything should be in order.
How To Orient Yourself During The Trip

Good orienteering skills can help you determine your current location and plan your route. There are two most popular ways to determine your bearings so you can plan your route.
Use a paper map and compass
The classical way. It’s nice to know that laminated maps and compasses are very long and helpful in extreme situations with a certain degree of accuracy. It requires concentration and thoughtful work on the map, so it is suitable for developing a “sense of space.” Learning to navigate with a map and compass requires regular practice.
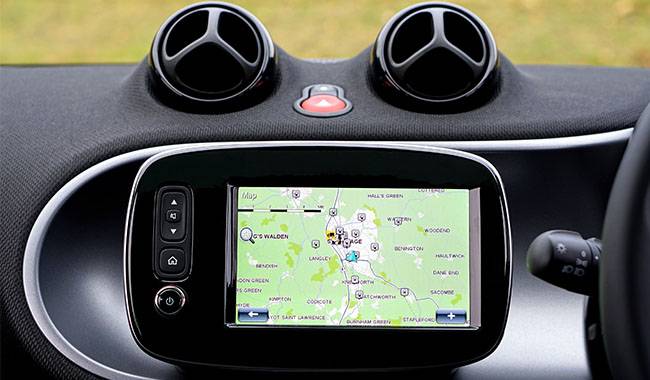
On electronic devices that use satellite signals, such as GPS
It is a modern method that allows you to determine your location quickly and easily check it against a pre-installed track. It’s convenient because it gives quick and primarily accurate answers. But it’s also tricky: if you don’t know your area, you can develop “disorientation syndrome” – “constant track checking” – where you don’t analyze the terrain but relate your position to the track you’re on. It’s also worth considering the drawbacks of electronics, limited run time, and possible errors due to satellite signal interference.
It’s best to practice planning and orienteering skills, starting with a route you already know or have completed. In this way, you can get rid of the fear of getting lost and gain or improve your map and compass skills. Here’s what to do.
- Draw a track of the upcoming route at home.
- Calculate the number of kilometers and the time. Then, use a map service to print out a map.
- Walk the route with a paper map.
Practice by participating in activities with an orienteering element: rambles, marathons, or multi-person runs. They provide ideal conditions for practicing planning the shortest routes and orienteering, with courses of different difficulty levels and separate categories for beginners. A pleasant bonus – you are left with a detailed map of the area, which you can traverse more than once. The main thing is to compact it with transparent tape or carry it in a sealed case.
The forces of nature: ants rely on scent for direction, migratory birds on the sun and stars, cats and bats on magnetic fields, dolphins on low-frequency sound waves, and dung beetles on the Milky Way.
If you can’t get to the woods or the nearest park and competition isn’t imminent, try practicing on your computer or phone. For example, certain related services available on the Internet and cell phone applications can help you train your memory, map skills, and quick decision making.
9 Steps To Travel Itinerary Planning

Successful planning is a step-by-step approach. Stage by stage, you will get an idea of the whole trail, its unique features, and places that need special attention. And in this process, every point counts. Neglecting even one of them can lead to gaps in your understanding of the goals and specifics of the journey. And that can lead to stressful or life-threatening situations. That’s why it’s important to work through even the most seemingly simple routes.
A clear understanding of the track ahead is often underestimated. And there’s a reason for that. It’s important to know exactly how much time you have at your disposal and how much distance you need to cover. Many reports sing of errors in time and distance calculations, for example, in the form of “darkness suddenly falling.” Naturally, there is no suddenness in this. Darkness falls at the right time, the temperature predictably drops, visibility decreases, and fatigue gradually increases. That’s how it happens, not the other way around. Often, the wrong time is to overestimate your strength and underestimate the complexity of the route. Hence, traveling shorter distances than planned, which leads to overnight stays in unprepared places.
Exploring the terrain and calculating distances
After choosing the direction, we have to study the topographical map of the area we cover. It is important to have a topographic map, not a tourist map, because it is not detailed enough. Topographic maps contain detailed information about the terrain, trails, woodlands, reservoirs, and other visually detectable landmarks. Topographic maps contain distance information, which is “coded” to scale and elevation differences. With a topographic map and compass, you can navigate with great accuracy.
In mountainous areas, it is important to pay attention to large relief elements: ridges, valleys, rivers, mountain passes. When planning a hiking route, it is important to consider both horizontal and vertical meters. On a 1:25,000 scale map, each horizontal centimeter is 0.15 mile (250 meters) on the ground; on a 1:50,000 scale it is 0.31 mile (500 meters).
Horizontal lines are closed arcs, all at the same height above sea level, used to determine elevation differences on topographic maps. These lines indicate the topography. Where the horizontal lines are close together, the slope will be steep. While the horizontal lines are far apart, the hill will be gentler. The general principle of tracing is to choose the track with the least elevation gain or loss. Exceptions usually happen when visiting places of special interest or for training purposes.
The distance of a paper map can be determined by using a curvature meter. This instrument consists of a toothed roller and a counter for counting the number of teeth walked. To find the length, you need to roll the roller along a line on the map. The dial or display will show the length in centimeters/inches. Knowing the scale of the map, you can easily calculate the distance.
Determining the complexity of the route
The first thing to do is figure out whether the route is easy, medium, or complex. Different dashed lines indicate these on the map. Its coverage and “readability determine the difficulty of a clue.” It would help if you kept in mind that the trail may appear in an unmarked place on the map or not appear in a marked area. Following an azimuth angle, a straight line may be easier than looking for a constantly disappearing trace.
During the planning phase, it is also important to identify technically difficult places: switchbacks, steep ascents and descents, couloirs, dense forests, snowfields, and glaciers. It is recommended that you study hiker reports and photos of the area where you plan your route. It would be best to keep in mind how much the difficulty of the same trail can vary in different weather conditions. Snow-covered boulders or thawing talus can be a significant obstacle, forcing you to turn around or find a detour.
Assess your ability
It is essential to be critical of your strength and fitness level and establish a schedule that allows for delay rather than acceleration. This will help avoid wasting energy early and maintain a comfortable pace. For example, on a group hike, you should consider everyone’s experience and fitness and tell everyone ahead of time where the route is, how long it will take, and what the load will be.
OK, the training schedule is set, and the working holiday is approved – it’s time to start working on the itinerary. At this stage, judgment and critical thinking are very important. The success of the entire event depends on how accurately and competently you plan your route.
Your schedule must be even, preferably no more than 6.2-9.3 miles (10-15 km) per day. If possible, try to make small traverses during the first days, allowing people to spread out. Of course, don’t forget about acclimatization. The difference in elevation between overnight staging areas mustn’t exceed 0.31 miles (500 m), and the elevation gain should not exceed 0.62 miles (1 km) per day.
Be very careful when planning day hikes
Again, 6.2 miles (10 km) per day is OK, and 12.4 miles (20 km) is the limit (unless, of course, you have a sports team, and your goal is to close the grade). When you work with maps and measure distances, remember that in reality, it will be longer, and you have to take into account the terrain, so always introduce a correction factor of 1.2-1.4, depending on the complexity of the terrain. Speaking of maps, the author prefers these maps, but you can easily find an alternative on the Internet.
Do not overdo it
Plan a day trip after every 3-4 days of the route. Divide your itinerary into roughly equal parts, find places of interest, and stay there – after all, you are on vacation.
you must have a contingency plan
Look at the route of the route, look at the passes you have to pass, and imagine that for some reason you can’t pass one of them (bad weather, lack of experience, equipment, strength) – what would you do in this case?
And go further. We always hope for the best but also assume the worst, and you should have the option of an emergency evacuation from the route. Imagine that one of the participants needs to be evacuated. How would you “get out of civilization”?
Calculate travel times
These times are based on an average speed of 3.1 miles per hour (5 km) on flat ground, 0.18 miles per hour (300 m) uphill, and 0.31 miles per hour (500 m) downhill. The physical condition of the competitors must be taken into account and adjusted to the weather and road conditions. Ice, snow, mud, grass, technically difficult sections without trails – all these factors will slow down the pace.
Don’t forget to schedule time for breaks and sightseeing. This is an average of 5-10 minutes of rest time per hour or 10-20% of exercise time. In sport hiking, rest periods are calculated separately.
By calculating the distance, time for climbing and descending, time for passing difficult parts, as well as time for stopping and possible force majeure, you will get an approximate time to orient yourself when planning your route.
Note: Don’t just considering external factors, also think about the weight of your pack. It affects your speed, so it’s important to make the load as light as possible while maintaining an acceptable level of comfort and safety. Read the article “How to lighten your gear so you don’t get bored with backpacking”.
Marking water sources
It is important to note places where water can be replenished in advance and find information about its quality. Experience has shown that many of the springs marked on the map may be seasonal. Water is only available in spring and early summer when the snow is actively melting. Water from unreliable springs, such as ponds, may have to be filtered, and wells may not have a way to get water from deep water, requiring rope and ingenuity to reach the water of life.
It is also important to determine the distance between springs and calculate the amount of water used for work and backup. Lack of timely hydration can greatly reduce the speed and add time to a hike. Don’t overlook the stores and cafes along the way where you can purchase water.
Planning Overnight Accommodations
Good overnight accommodations are usually marked on a map. They are generally large and flat, with no avalanches, standing water, or falling rocks. However, please note that conditions can change, so reassess the site’s safety on the spot, regardless of the campground’s popularity. When planning your route, you should also consider shelters, barns, and other man-made refuges for overnight stays and avoid the weather.
Consider safety measures and evacuation plans
When planning, consider safety precautions to avoid difficult terrain and escape routes to civilization. The weather in the mountains can change very quickly, so it is necessary to have the coordinates of all possible shelters. These may include special tourist shelters, shepherd’s lodges, or natural shelters.
There is often no signal in the mountains. A satellite phone or satellite tracker will be helpful, it will show you the location in real-time, and some of it can be text messaging. If you are traveling on a potentially dangerous route, you will need to register with the local Ministry of Emergency Situations or the relevant local service abroad. You should understand that the more inaccessible an area is, the longer it will take for rescuers to get there. Helicopters are rare, and take-off times depend on the weather, so chances are rescuers will have to walk to you, which takes time. If you evacuate a casualty, the return trip will take several times longer. Consider also that if you leave the trail, you will need money to pay for transportation services. This should be budgeted for in the budget for the hike.
Analyze experiences and deal with mistakes
Planning doesn’t stop at the map. To avoid future mistakes, you need to analyze the information after you return from the hike: did the actual data match the planned data, where did you spend more time than you expected, and what difficulties did you encounter along the way. Answering these questions will help you plan your next trip correctly.
Other Matters
Leave no trash
Leave no trash, just your footprints behind you.
There is nothing worse than finding the remains of someone else’s picnic along the trail because it ruins the experience for the next hiker. One small wrapper thrown on the track is enough to ruin a hike. Sure, the journey belongs to you, but the trail belongs to everyone!
No need to be a hero
Stick to the planned route and avoid the temptation to cut or turn to see more of the trail. Walk at an even pace. The smoother the transitions, the farther you will go. Plan stops along the way, keep your map handy, and stop only where you plan to. Enjoy the beauty of your surroundings.
Remember: the goal is the journey itself, not getting from point A to point B.
Hiking footwear is important
Hiking Shoes This may seem insignificant, but remember: you won’t be walking on tarmac but mountain or forest trails. Good grip and foot comfort will go a long way towards a successful trip. So choose a good pair of trekking shoes and trekking socks to keep you confident on the trails.
Useful Services For Route Planning
During the route research phase, it is convenient to use the e-services that quickly display the different track options and the maximum number of combinations and help choose the most convenient tracks. Save the generated version of the track and upload it to your watch, navigator or smartphone. They will support you when working with paper maps. Of course, you can use tracks as your primary means of navigation, but in this case, the learning effect and immersion will be significantly reduced.
Services for route construction and analysis
No matter where you fall on the spectrum between rough and luxury camping, there are undoubtedly a growing number of apps that can improve the camping experience. We all need some road map. So here’s a collection of apps to help you build the best experience when gazing at the forces that will usurp the earth or planning an enjoyable hike.
Google Earth
Google Earth is a 3D model of the Earth. When planning, tracks can be uploaded, importantly in XML format rather than the familiar GPS format, and can visually assess features of the terrain. It is helpful to visualize elevation markers in conjunction with topographic map analysis of the area of interest.
Suunto
Suunto is an Android and iOS app for Suunto watch users that automatically calculates the most logical and shortest path from a given “point A to point B,” creates a track, and outputs it directly to the watch for route guidance. Suunto also provides users with a summary map of their completed tracks and a different Track Attendance Heat Map version. Easy to plan runs and hikes during the day in unknown areas.
A3. Locus Map
Locus Map is one of the many popular navigation applications. You can use many topographic maps online, download them offline, “fill in” tracks, and individual points. It has the classic gentleman’s set to understand your location and future journey.
A4. with other camping apps
- The Dyrt
- WikiCamps
- HipCamp
- NPS.Gov
- Reserve America
- FreeRoam
- AllTrails
- Tentrr
- Boondocking
- Packing List Checklist
The accuracy of your location depends on the accuracy of your device. The weaker the GPS signal reception, the less accurate the display. Signal interference can be severe in narrow canyons, deep gullies, dense, tall forests, and even between houses in cities. Jammers may be installed near security facilities, which can also cause serious interference. Inside caves, dungeons, and houses, GPS signals are usually not received.
Before you download an app or find a map online, read The Best Mobile Maps for Travelers. There you will find the most useful things to help you plan your route.
Weather Forecasting Service
When hiking, a lot depends on the weather conditions. Therefore, you should check the weather forecast in advance. Here are some resources on the topic.
Windy
has a wide range of features to analyze cloud cover, wind direction, air, and ocean temperatures. The service also allows you to view local webcams. Detailed forecast patterns are available hourly for the next 10 days.
Mountain-forecast
It features an indication of the weather conditions in an area but at different altitudes. This is helpful when making routes with a large drop in altitude. Detailed data are available every 3 hours for the next 5 days and every 12 days for morning, afternoon, and evening.
B3Weather-forecast
It is a similar service that is not limited to mountain ranges and therefore has a complete geographical range of weather forecasts. It provides morning, afternoon, and evening forecasts for the next 6 days and the next 12 days in a detailed forecast mode every 3 hours.
Snow-forecast
It is handy for forecasting snowfall probabilities and amounts, especially for ski resort visitors and hikers. It can be provided in detail every 3 hours the next day, for up to 6 days in the morning, afternoon, and evening format.
Following the planning stages will help you avoid missing the main points, and the individual features of the route will prepare each track a creative and exciting affair. After all, the journey starts with the first glance at the map!
If You Like This Article, Please Share it With Your Friends On Social Media.