If you are in the great outdoors, away from civilization, whether you are camping, hiking, competing, or in extreme circumstances, you will need to camp for one night or longer. You will learn more about The Advice for Building a Camp by LCN Outdoors article.
Camping accommodations can be divided into several stages.
- the selection of the location.
- setting up the tent.
- building a fire.
- drying things.
- water use.
- camp cleaning.
Each point is now covered in more detail.
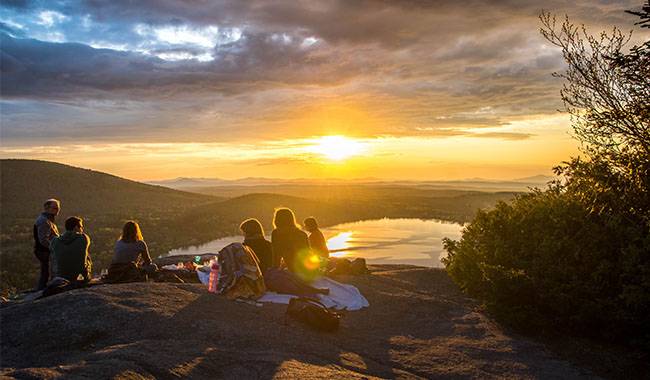
How to Choose a Campsite
The main criteria for choosing a campsite in the plains should be the following.
- Summer – the presence of water.
- Winter – the presence of firewood;
The presence of water and firewood nearby is a good thing, but it is not always the case.
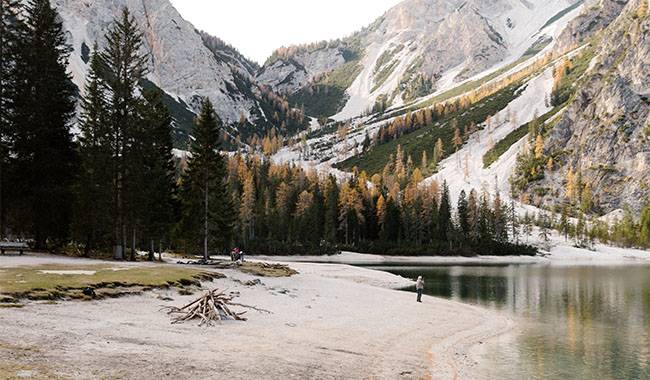
Do not camp near unreliable trees, broken branches, cliffs, rocks, or steep slopes. We also recommend not camping too close to water, especially in the spring when water can rise several meters in a matter of minutes, on wildlife trails, or in secluded areas. You also shouldn’t camp near populated areas. Why do you need drunken, nocturnal talkers?
By the way, if you have to camp near an unfriendly object, try making a Dakota stove instead of a traditional campfire, which will help you stay out of sight and cook faster on it.
Recommended places are grass, meadows, and gentle, wide riverbanks. Once you find a safe place near water and firewood, set up your tent.
Pitching a Tent
Choose the flattest, driest, cleanest ground for your tent. If there is a slight slope, pitch your tent there so you can sleep with your head up. If it’s been a stressful day and you’ve walked a long way, you can lie down with your head down and let the blood drain slightly from your feet. Sometimes you can alternate, but don’t get carried away.
Light on both sides. It’s a good idea to let the sunshine into the entrance of your tent in the morning. It’s more pleasant to wake up to, and the condensation from your tent will dry faster.
Under the tent, you can put some linen (branches of coniferous trees) under the tent. This will act as insulation and is also a soft bedding material. Although it is better to have a good self-inflating pad and not have to worry about warmth and comfort.
Lapnik can be used as bedding at the entrance so that if you have to stand on clay or wet ground, you don’t get the tent dirty. But this is the last resort – take care of nature.
If you have to pitch your tent when it rains, or if you expect the weather to get worse, you can dig a small ditch around your tent. That way, water running down the tent slope doesn’t go under the tent but stays in the gutter.
If you pitch your tent under a large tree, make sure there are no dangerously large branches that a gust of wind can break. In the worst-case scenario, you could damage the tent or the people in it.
Once you have pitched your tent, secure it with stakes or rocks and pull back the windbreak. The evening will probably be calm with no signs of a hurricane. So you don’t have to crawl out of your warm sleeping bag and pitch your tent in the rain at night, it’s best to do all this in advance in case of high winds. Of course, it depends a lot on the region. In Lake Baikal, it is likely to blow away.
Leave your stuff in the tent overnight. Protect from precipitation and uninvited guests – forest dwellers, for example. It is especially important to keep food safely hidden away. After we went to collect firewood for the fire.
How to Make a Fire in Humid Conditions

Choose a campfire site away from dry trees (deadwood) and tents. Do not start a campfire on a peat bog, it is dangerous. Such fires can smolder for months, are difficult to put out, and can cause fires. If you can find a corner near a rock, for example, or in a low area, that’s great.
We won’t teach you how to build a fire, only what to do if you build a fire in bad weather, heavy rain, or sleet.
- The first thing to do is to choose a place that is as sheltered from precipitation as possible. Under the canopy of a large tree or under the canopy of a cliff, if there is an awning, use it of course.
- The next difficulty will be obtaining dry firewood and kindling. This is really easy, especially if you are in a coniferous forest because spruce trees have dry knots and twigs (always covered with branches) at the bottom of the trunk. There are also things like moss or fungi there. These can be used as kindling. They are absolutely dry in all weather.
- We look for firewood as usual – cut down a dry tree or find a fallen tree. It will not be affected by the rain, because it is still dry inside. Or you can collect dry branches lying on the ground. You can check if the wood is dry inside by breaking the branches. If you hear a loud crackling sound, it’s dry. The most important thing to do is to light a fire.
- And, as always, when starting a fire, we start small – light dry firewood first, then put in little dry twigs and larger branches, and after the charcoal fire appears, we can also put in wet firewood (wet on the outside and dry on the inside, of course). Then make a nutritious dinner after a tough traverse.
How to Dry Clothes While Hiking
After a hearty lunch, as they say, it’s time to lay down and rest …… But it’s nice to have a set of walking underwear that got soaked during the day and be able to dry it. Many people dry their clothes on the fire, and we strongly advise you not to do so. But if you’re wearing an oilcloth jacket and pants and canvas boots on your feet, you probably don’t have a better option. But we’re talking about tourism in the 21st century. Clothes made of synthetic materials can’t go near a campfire; they can burn through in less than a second. In addition, materials lose their properties at high temperatures; for example, Gore-Tex tapes or any other tapes will disintegrate at temperatures as low as 113 °F (45 °C).
So here’s what we do. If your clothes get wet, a fleece, membrane windproof jacket, or thin windproof pants, just wring them out and hang them in the tent. One of the benefits of modern outdoor clothing is that it dries quickly, so don’t worry, by morning it will be almost dry, if not completely dry. You’ll also wear them while they’re drying. Thermal underwear and socks, we also wring them out and if they are warm enough, take them to the sleeping bag (if the temperature outside at night is close to 32 °F (0 ° C), it is best to put them in the sleeping bag). Generally speaking, drying clothes on the belly of your sleeping neighbor is a favorite pastime of many campers.
In principle, you don’t have to worry about your clothes while walking, no matter what the weather (exception: winter), you can walk smoothly even in wet clothes and you will feel warm while moving.
Most importantly, make sure your bedding set is always dry because a comfortable night’s sleep is a good start to the next day.
How to Dry Your Shoes when Hiking
If clothes can dry themselves on the next hike, shoes won’t do the trick. Shoes, especially hiking shoes, take a long time to dry out. And it’s almost impossible to dry them completely in multiple layers in winter. That’s why we recommend a few ways to ease the pain that walking in wet shoes can cause. There are several techniques you can use to dry your boots.
First, squeeze out and remove as much of the insole as possible. Insoles can be dried on a burner, or placed in or under a sleeping bag.
- Remove excess moisture by absorption. You can use socks as an absorbent. Stand in your shoes, the socks will absorb the moisture, take them off, wring them out and put them back in the shoes. Socks can be dried regularly on a burner (again, a reminder of the safety of using an open fire in a tent). Even better than socks are special microfiber towels. It is compact, lightweight, and absorbs moisture in seconds. It always comes in handy when you’re out and about, and it dries faster than a pair of socks. The classic kitchen towel is a great absorber. For best results, you can use toilet paper. Just don’t forget to calculate the amount for each class. If you’re in the woods, you can dry your hiking boots with dry moss. It absorbs moisture like a sponge.
- Something you can’t do, but everyone does – dry your boots with a burner. By heating the air around your shoes, you can dry your summer hiking shoes in 1.5 hours. However, keep in mind that doing this in a tent can burn you, make sure you have good ventilation. In addition, you are putting the integrity of the membrane at risk. Winter hiking shoes made of membrane and foam should not be dried in any way.
- Finally, use the following method: boil a liter of water, pour it into 2 0.13 gals (0.5 liters) bottles (plastic, of course) or flasks, and put them into your boots. By morning, the condition of your boots will be much improved and near perfect.
- If your shoes are still wet in the morning and you need to move on, use your grandfather’s method – put your feet in dry socks, put them in a bag, and put them in your shoes.
- We highly recommend having spare dry insoles and socks on hand, very helpful!
Try and experiment.
How to Use Water at the Camp

If you are camping near a stream, fetch water upstream and wash dishes and bodies downstream. Don’t forget to use a filter. As the MSR slogan says – “No one knows what’s going on upstream”. Remember, classic filters only remove suspended matter and bacteria, but do not protect you from possible viral infections. Ideally, bring a UV water filter as well.
How Can You Purify Water if You Don’t Have a Filter?
Very simple – you have to make your own filter. For suspended water and chemical contaminants, there are many natural absorbers – sand, moss, and charcoal from a fire all work well. To make a filter, layer them in a plastic bottle and make several holes in the bottom to drain the purified water. Sand is on top and moss is on the bottom. Viruses and germs can be detoxified by adding iodine or small amounts of manganese crystals to the water. If you have time and the sky is sunny, simply leave the water in the clear bottle in a sunny spot for a few hours.
Camp Cleaning
It’s morning. You’ve had a good night’s sleep. Your clothes are dry. The weather is getting better. Now it’s time to hit the road. But before you go, be sure to collect any burnable trash (or take it with you, if you can). Bury the glass. Tin cans are usually thrown into fires, so once they’re heated in the fire, they should be crushed (just step on the can and it’ll be easily squashed) and buried – tin decomposes quickly and makes great fertilizer. Anything you bring with you, take it with you.
Be sure to put out the fire. (Especially in wooded areas of the National Forest).
To transport your waste, consider purchasing a special tapes garbage bag. It ensures that the waste is transported airtight, as there is always something that can leak. In addition, the tapes material will prevent “suffocation” of the contents.
A sealed garbage bag with a unique closure system allows a plastic bag to be inserted inside. So airtight that it won’t even allow liquid waste to pass through. Double sealed seams with side loops for easy hanging.
Finally, the parking area must remain the same as it was before you arrived. We are guests. Thanks for this place and keep on the road ……
These tips will help you navigate the rough terrain more safely and comfortably. Generally speaking, it all comes down to experience. So travel, hike, hone your hiking skills, adapt to the great outdoors and you’ll be glad you did.