Drying has been a familiar way of preserving food since the Stone Age. Roots and fruits collected by Neanderthal beauties were hung in the shade to be added to the broth of mammoth legs in winter for added flavor and action. And the second leg was dried in the cold, cutting off a piece at a time, for months at a time. You will learn more about How to Dry Food for Camping by LCNOutdoors article.
Even today, “walking on dry ground” is one of the main factors in saving weight when camping. Yes, you can buy ultra-modern equipment, the lightest tents, 1.1 lb (0.5 kg) heavy sleeping bags, weightless backpacks for easy hanging – but if you put five cans of stew, 2.2 lb (1 kg) of onions, carrots, and sorbet in your backpack, that is, all this effort will be for naught once you increase the weight to an unbearable level. On the other hand, drying will reduce the weight of the food by a factor of 10 or more. So, it’s decided, we’re going to go light, as they say in Europe, Fast&Lite. let’s dry!
What Can Be Dried And What Can’t?
All kinds of vegetables, all kinds of fruits, lean meats, and cheeses can be dried for camping. Protein and carbohydrate products give off moisture well and regain it after soaking and boiling. Even dried fruits can be dried! Dried apricots, in particular, can be used for morning porridge. But if you plan to eat them on the go without soaking, it’s best to leave them as they are, somewhat undried, or they will break your teeth.
Note: You can’t dry fatty foods: lard, butter, and fatty meats. Some lard and oil will have to be kept around intact in order to maintain the minimum amount of fat needed in your diet.
It may also be pointless to dry cucumbers and radishes. They don’t get any fresher and are of little use in cooking.
What Foods To Dry When Camping?
There are three ways to do this, each with its own advantages and disadvantages.
- in the oven or in a dryer over the stove.
- in a draft in a natural way.
- in an electric dryer.
Drying food for camping on a home stove
Every home has an oven or stove; stovetop dryers (called mushroom dryers) are available at hardware stores for about $20 or so. Please note that it only works on gas stoves!
Advantages of drying on the stove/in the oven
There is only one advantage to drying on kitchen appliances – you don’t have to have extra appliances in the house. If you have an electric oven with a gas-filled burner, it dries well and is comparable to an electric dryer.
Disadvantages of drying in a stove/oven
- The house will be hot and muggy for a few days before the trip.
- Food, especially if there is no forced ventilation in the oven, will need to be monitored regularly. Turn over with a spatula, remove pieces that have dried and add new ones.
- The possibility of product scorching is high; open the door to heat unevenly in the oven.
- For safety reasons, gas ranges and ovens should not be left overnight. An open flame may be fried, while a mixture of gas and air is explosive. The electric cooker is less dangerous, but it may also overheat and short-circuit the wires. So it may take quite a long time to dry out.
However, if you go camping once or twice a year and for a short period of time, meaning you don’t need much food, this is a viable option. It is quite feasible to bake food for your family for a few days over a weekend.
Dry food naturally outdoors
A great option for drying bread crumbs. For example, you can simply cut the extra bread into squares, place them on newspaper and leave them in a well-ventilated, dry, and cool place for a month. Not in the sun!
Greens such as parsley, dill, basil, cilantro, celery, and peppers can also be dried in the eating water. Simply spread out or string bunches of herbs and let them dry for 7 to 10 days.
Vegetables and mushrooms are more difficult to dry this way, but it is possible. Very dense mushrooms and vegetables such as potatoes, carrots, and beet only need to be sliced thinly.
Advantages of natural air-drying
- The flavor and color of the product are as close to the original as possible.
- This method requires almost no manual labor.
Disadvantages of natural drying
- Meat cannot be dried in this way. Max – you can get quite heavy raw astringency in a month and a half, and even then.
- Raw vegetables (tomatoes, bell peppers, etc.) also can not be dried in the sun.
- considerable time cost: a week for drying vegetables and bread, up to two weeks for vegetables and mushrooms.
Drying food in an electric dryer (dehydrator)
Progress continues, and inquisitive people have long figured out how to optimize the drying process. Today there are specialized electric dryers on sale, or, as they are sometimes called, dehumidifiers. They cost between $20-$50 but make life easier for hikers and climbers.
Electric dryers vary in the location of the fan (top or bottom), fan power, the presence or absence of a thermostat, and the number of trays. In an urban apartment or small vacation home, what matters most is how quiet the dryer is, not the power or volume.
Advantages of drying food in an electric dryer
- The labor input is low and your task is reduced to chopping and arranging the food on trays and pouring it into bags when the process is complete.
- The food is dried fairly evenly. It may be necessary to do one or two tray changes to dry the entire amount of food more evenly.
- If necessary, you can leave the electric dryer in peace overnight. It hums quietly and does its job. You shouldn’t put it next to your bed, but it won’t disturb the people at the kitchen table.
- It’s almost impossible to burn food in an electric dryer unless you go away for the weekend and leave it behind.
- An electric tumble dryer can dry anything that contains moisture – from meat to peaches to tomatoes.
- The flavor and color of the food are perfectly preserved after drying.
Disadvantages of drying food in an electric dryer
Buying an electric dryer is an expense. But if you go camping at least two to three times a year, it will certainly pay for itself in the first summer. In addition, an electric dryer will help you deal with the cottage’s harvest and the forest products of the season. All in all, it’s inexpensive and practical.
The principle of drying is the same: all water in the product must evaporate as gently as possible. This requires temperatures between 140-194 °F (60-90°C) and good ventilation.
How To Dry Dense, Medium Moisture Fruits And Vegetables On Foot
(apples, pears, potatoes, carrots, onions, garlic, eggplant, radishes, parsnips, cilantro, and celery root)
It is best to cut these vegetables into shreds or semi-rings 3 to 5 mm thick. It is easier to dry and the food retains its nice appearance.
If drying in the oven, place the chopped vegetables on a fine rack or saran wrap and turn the oven to the lowest setting. Make sure the door is left ajar. Dry our straws, turning the rack to 356 °F (180°C) periodically to ensure even heating, for about 4 hours.
If drying in an electric dryer, place the chopped potatoes, carrots, and eggplant in a dish, turn on the dryer, and forget about it for three to five hours. Then take them out and put them in a camping bag.
A ragman set for a group of 6-7 people: three potatoes, two carrots, two onions, two eggplants, two tomatoes, and the remaining meat. The total weight after drying is 80 grams. Just add some pasta and you’re done!
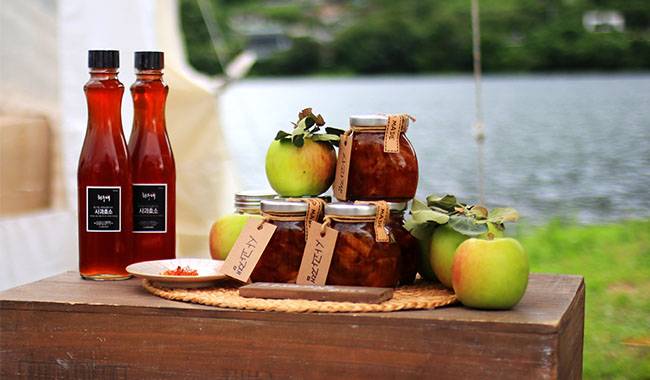
How to dry camping vegetables and fruits with plenty of water
(tomatoes, bell peppers, apricots, peaches, zucchini, cabbage)
The only difference is the cutting – you have to cut them up bigger. Yes, yes, bigger, because they shrink many times more than the plain, unadorned carrots. That is, we cut them into semicircles, but if we cut them into strips, the slices would be 5-10 mm thick. Apricots and plums are better dried by cutting the fruit in half and removing the core. They will dry for 1-2 hours more in the oven and you will have to turn them or you will not be able to remove them from the saran wrap or the rack! Otherwise, you will not be able to peel them off! Cut them, spread them out, and make sure they dry evenly. When the skins start to get crispy, take them out
How To Dry Camping Meat
This question is a bit more complicated. There are quite a few recipes for drying meat, but the basic three.
- dry minced meat.
- “Raw astringent”.
- cooked dry meat.
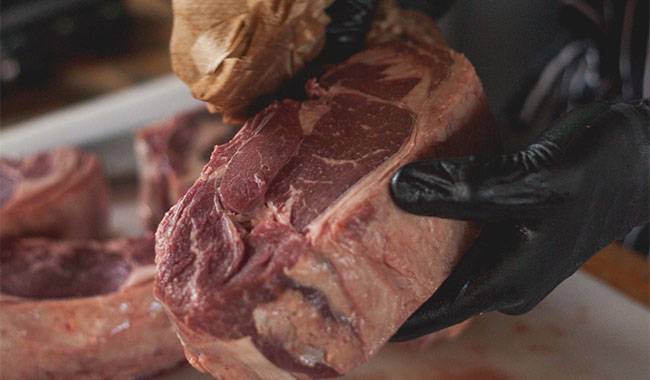
Choose dry meat
There is one common denominator when preparing meat for drying: the meat must be lean. Ideally, it should be tenderloin or, in the case of poultry, breast. You can tan rabbit, beaver, game meat – anything, as long as there is no fat layer.
However, beef or lamb is expensive, especially if you’re going on a multi-day trip and there’s plenty of meat to go around. Therefore, any part that has been cut from the bone and stripped of fat and large membranes will do. The sugary and fatty bones can also be used to make borscht, which you eat before you leave to saturate your body with the least amount of fat that you will take with us on the trek.
Dry minced meat in the oven
An old and workable recipe.
- We take meat, i.e. skinless meat, not ready minced meat – we put it through a meat grinder.
- You can add salt to the minced meat or not, you get pure protein.
- Spread it on an oven tray, about 1 inch (2.5 cm) thick, turn the oven on to 212 °F (100°C), open the door slightly, and let it dry for 7 hours.
- We scrape the minced meat from the baking tray and pass it through the meat grinder again.
- We put it back in the oven-dry it at 140 °F (60 °C) for another three hours.
If necessary, run it through the meat grinder again. But twice is usually enough. The result is a chunk that looks like dog food, but smells delicious, is rich in protein, and is very light!
Ground meat can also be dried in an electric dryer, but then it must be put in strips rather than in a continuous layer. There is no need for a second grind because the ground meat will turn into a powder and fall to the bottom of the dryer. Let it dry for 8 hours. Crush the strips with a mortar or by hand before packing them in plastic bottles or plastic bags.
On The Nutrition And Water-salt Regime For Climbers And Mountaineers
Jerky – in an electric dryer
Here we need a sharp knife, in fact, any lean meat will do. First, cut it into thin slices of any width. It is important that they are thin and the thinner the better. Then prepare the marinade.
There are many marinade options. The main criterion is that the marinade must not contain any products that promote fermentation. For example, the following combinations can provide good flavor
- soy sauce, a pinch of salt, ginger, cilantro, and black pepper.
- juice of one lemon, ½ cup water, a little sugar, salt, dried parsley or cilantro, and black pepper.
- Wine vinegar, salt, basil, oregano, a little sugar.
- mineral water, salt, one tablespoon of vinegar, chopped garlic, red pepper.
TiP
Can meat be dried in the sun without marinating? Yes, you can! But you still have to sprinkle the meat with salt for a few hours before drying. With a little more salt, jerky won’t taste as delicious and flavorful. But they will dry an hour faster.
Pour the marinade over the meat and mix well, preferably with your hands. Leave it in the refrigerator for a few hours. The marinade time depends on the meat. Chicken should be done in 5-6 hours, pork is best left overnight, and beef should remain for 12 hours.
Squeeze out any excess marinade (don’t panic if there isn’t any, it’s normal) and arrange the meat in a single layer on a dry plate. Open it up and go about your business! The meat should dry for 6-9 hours. When all the pieces are firm to the touch, the meat is ready to eat in any form.
Tip
Dried meat can be taken directly, made into slabs, or added to the food while cooking. However, this is not economical – dried meat is delicious, and hungry tourists will tear it for nothing under any pretext. And in soup or porridge, the plate remains a bit stiff. It is much more effective to take some plates for snacks or “evening snacks” only, and then grind a certain amount of dried meat for cooking with a blender. The result is a pile of fiber, a dry stew that is easy to pack into jars. In hot water, it only takes 5 minutes of cooking to have the consistency of meat and it still tastes great!
Cooked jerky
A recipe for those who are afraid of meat that has not been treated with heat. Take a piece of meat and simmer it for half an hour. Then simply take it out of the broth, sprinkle it with salt, and cut it into strips or slices. After that, you dry it in any way at 140-176 °F (60-80°C) until all the moisture is gone. The resulting meat is blander than the meat after soaking in the marinade, but it is quite tasty, besides it steams faster in hot water and you can leave it unshredded before cooking. Or you can use a meat grinder to shred it!
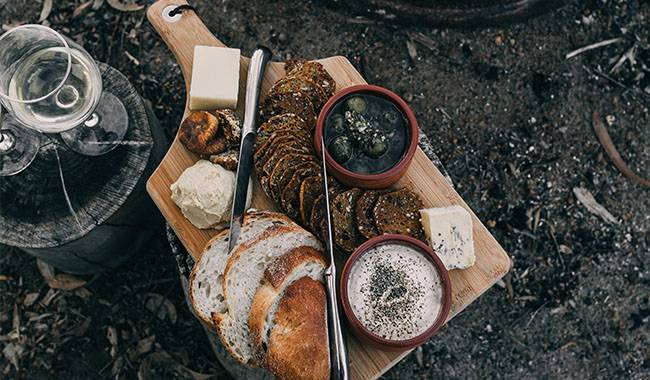
How To Cook Dry Food
This is the same as raw. The order of pitching is the same. Carrots, potatoes, beets, and turnips should be put in cold water as soon as you get to camp. When you get and set the burner or build a fire, they will get some water and boil faster. Everything else can be thrown directly into hot water; dried vegetables and meats take no longer to cook than cereals or pasta.
The only restriction is that dried goods can’t be fried!”. If you want to deep fry something, like carrots for pilaf, you must soak them for 15-20 minutes beforehand. Otherwise, it will burn.
Bon appétit! Enjoy the beauty of nature, have delicious lunches and dinners, and walk with a light backpack on your shoulders.